一、前置准备
- 安装Qt
项目需要下载开源版5.15.2版本,下载地址:https://www.qt.io/download-open-source#source
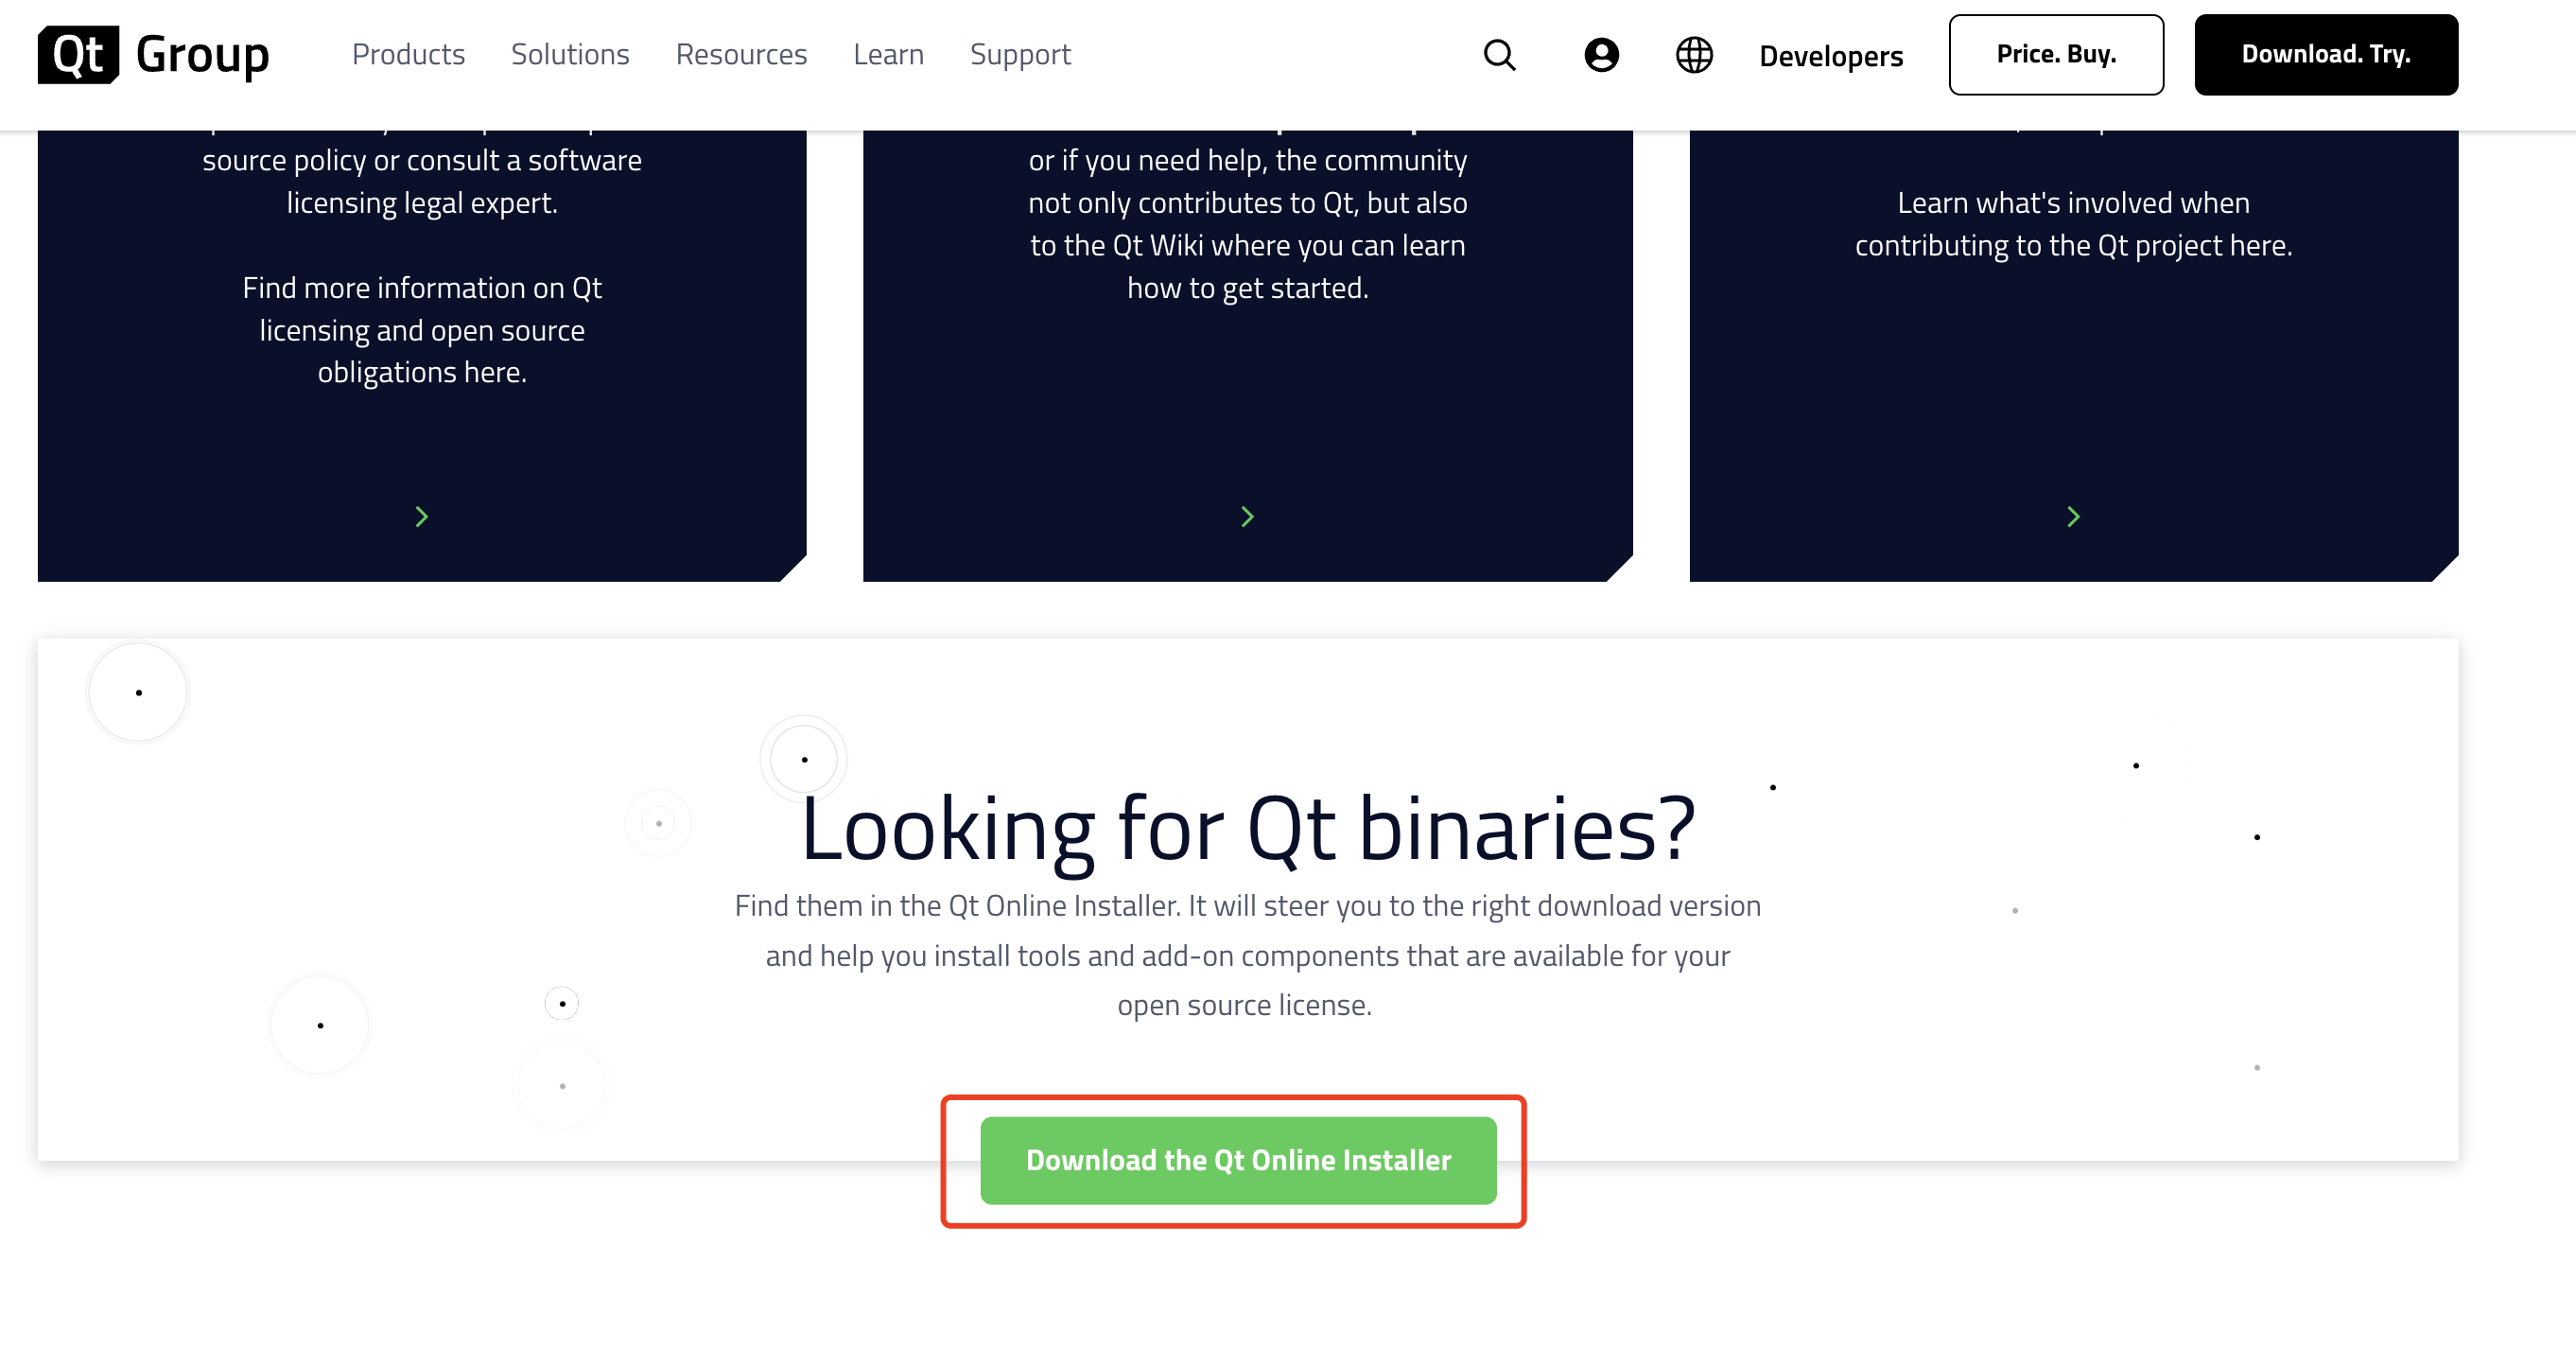
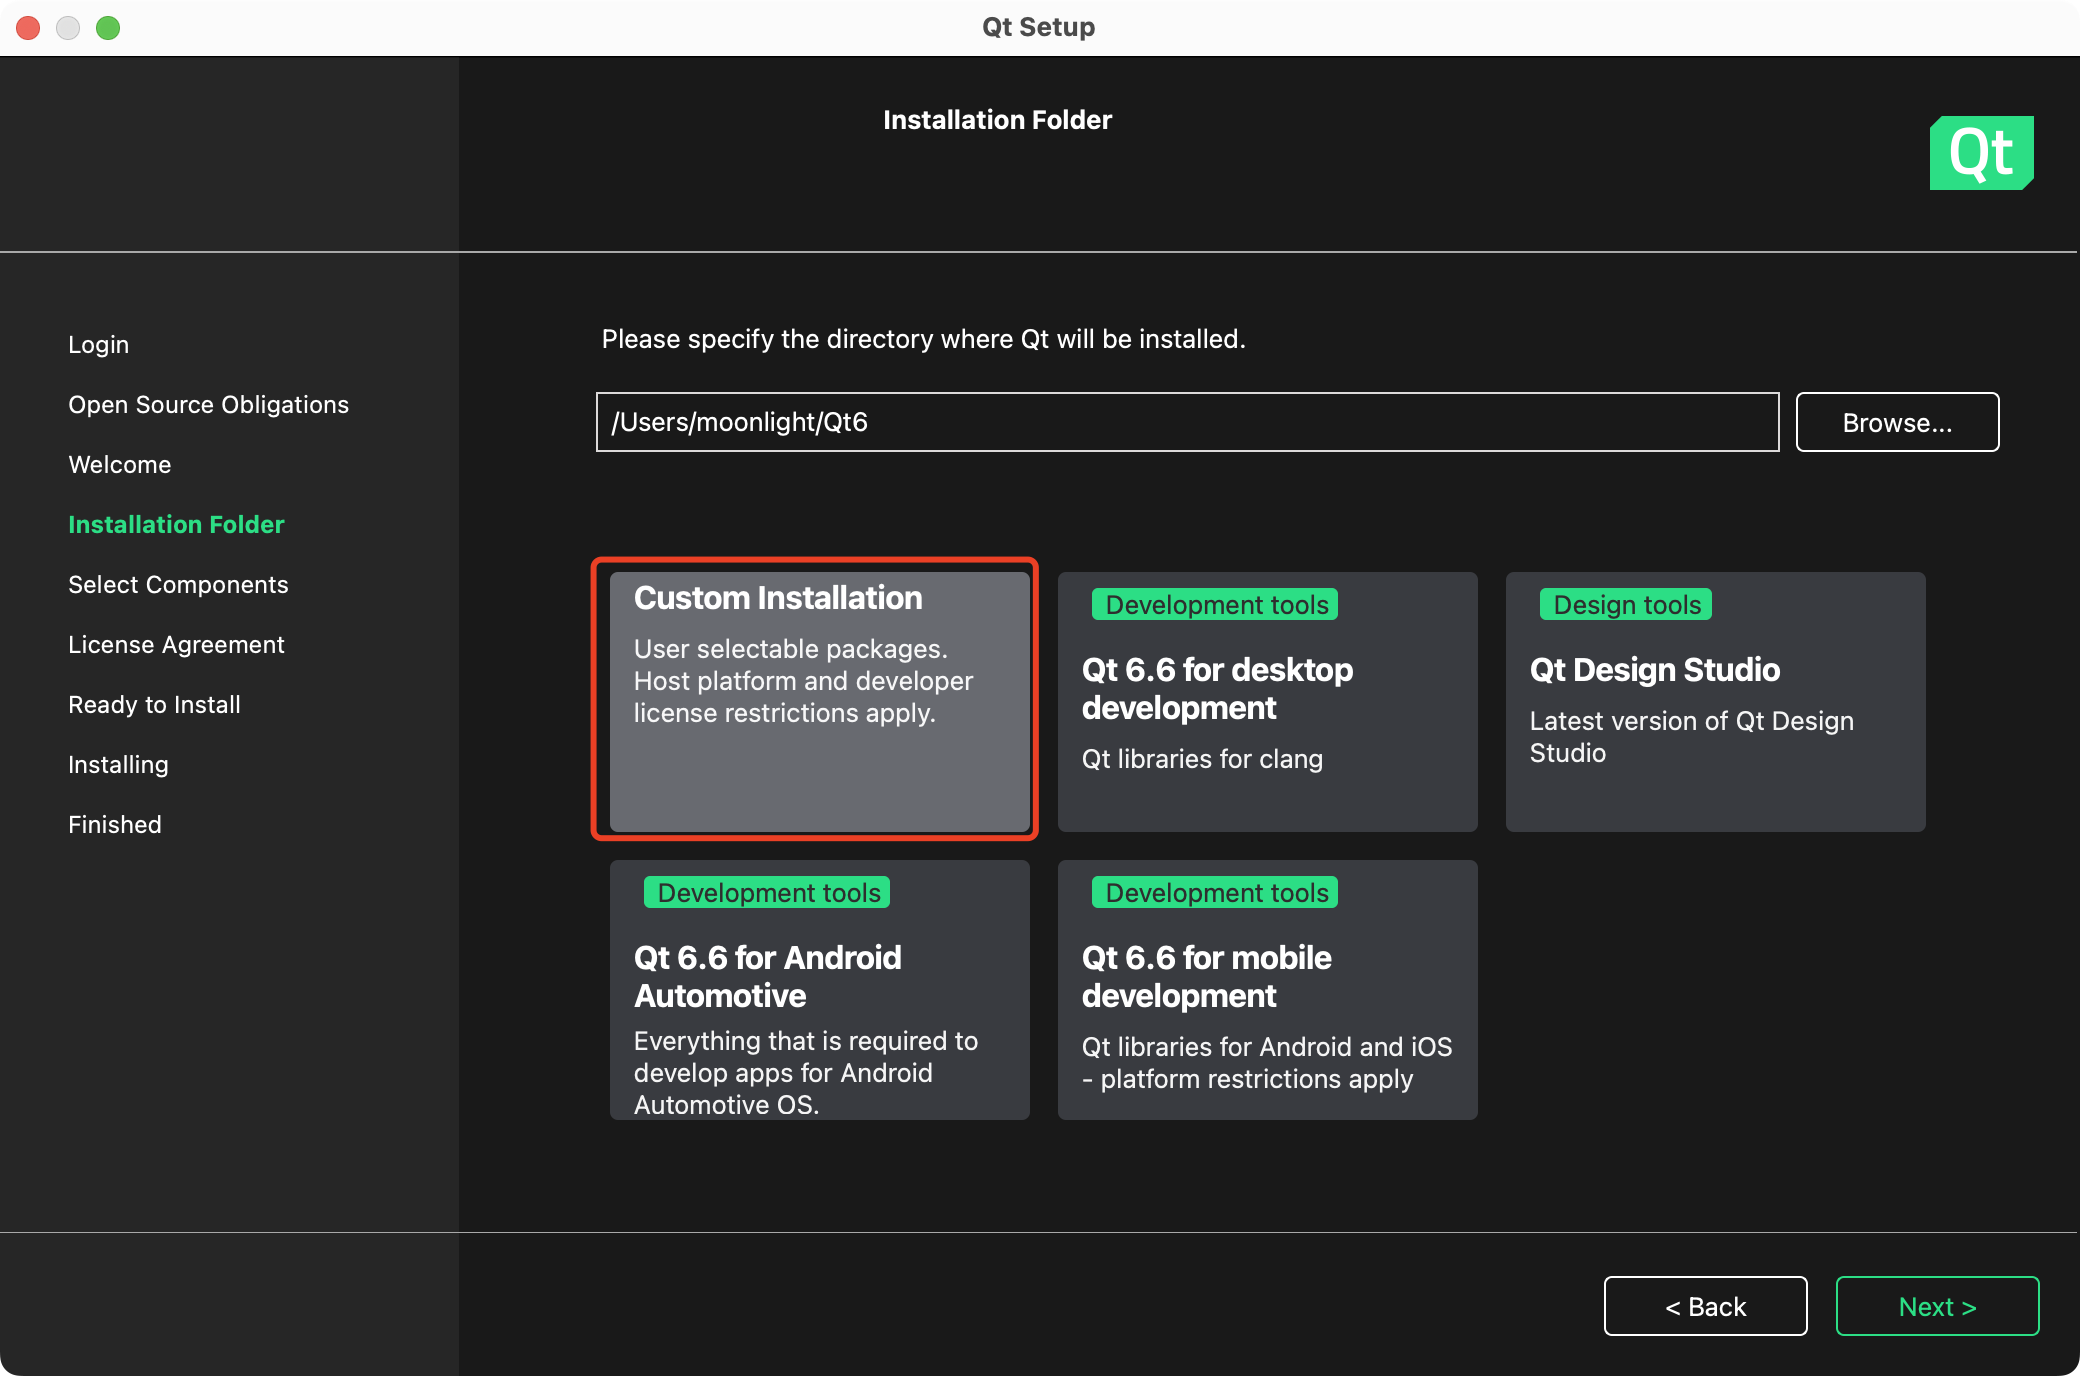
下载完成后打开,根据引导设置安装路径进行安装,由于这里需要安装一个较老版本的Qt,所以选择Custom Installation:
勾选Archive,点击Filter,就会出来老版本的Qt列表,选择需要的版本下载。
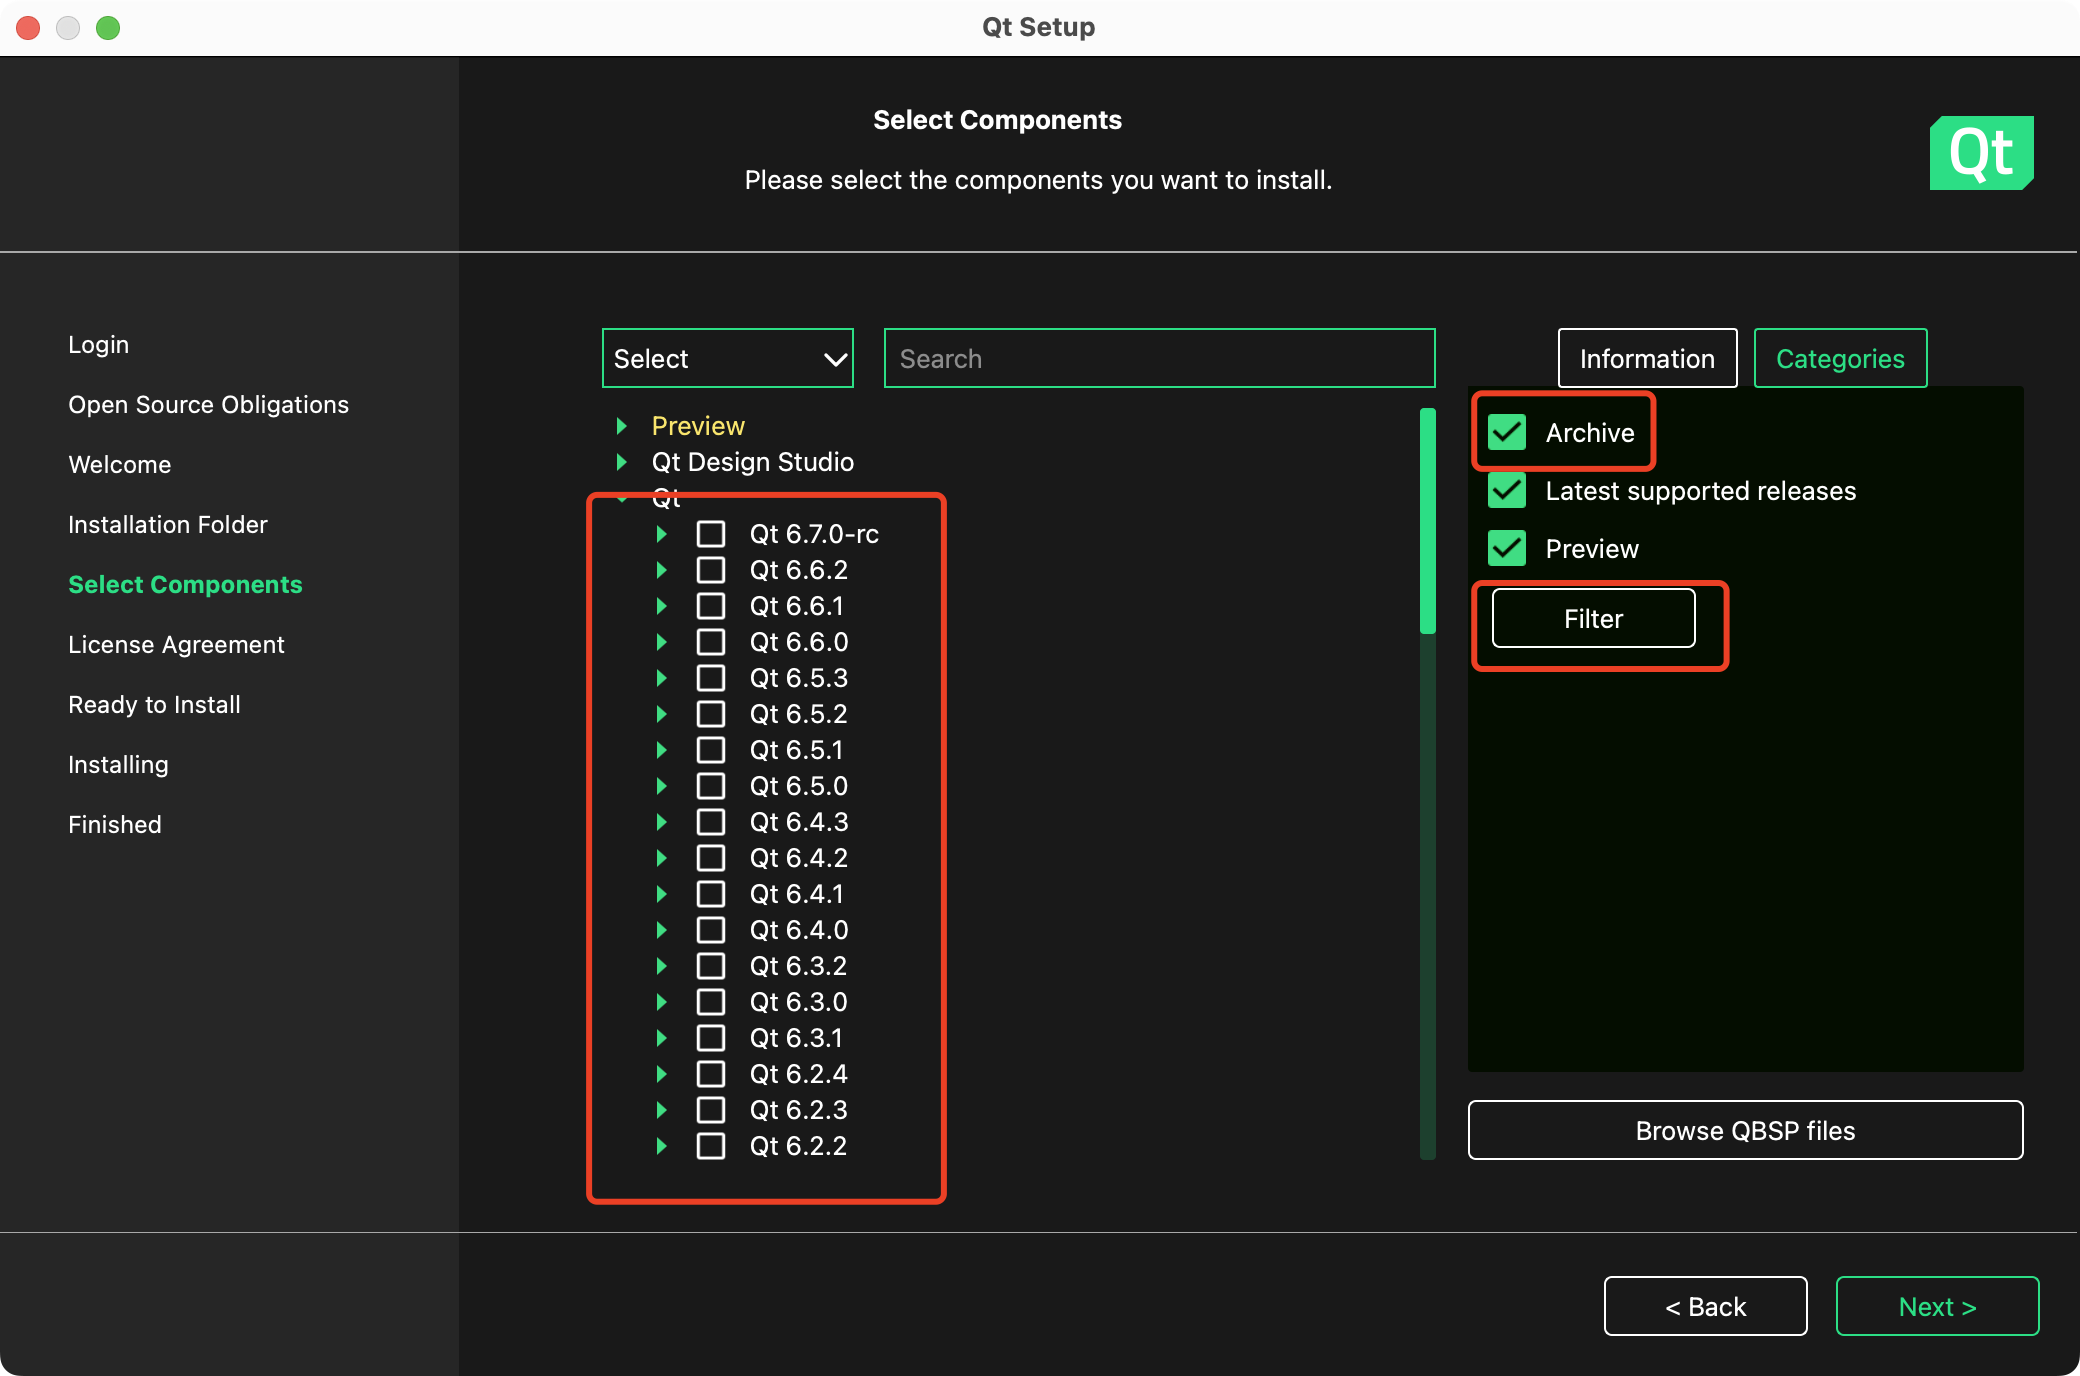
我这里安装的:

2.安装CMake
下载地址:https://cmake.org/download/
3.下载VTK
下载地址:https://vtk.org/download/,这里我下的是9.3版本。
一开始我下的是8.2版本,但在后续编译过程中报了错:
error: call to undeclared function 'ATSFontGetFileReference'; ISO C99 and later do not support implicit function declarations [-Wimplicit-function-declaration]
经过一番折腾,始终未能解决,后发现我的mac系统版本13.2,ATSFontGetFileReference方法已经废弃。VTK换成9.3版本,编译通过。
二、编译安装VTK
- 配置CMake
解压下载的VTK源码,并在该目录下新建一个build目录,用于存放编译后的代码。
1)打开CMake,指定好路径后,点击Configure:

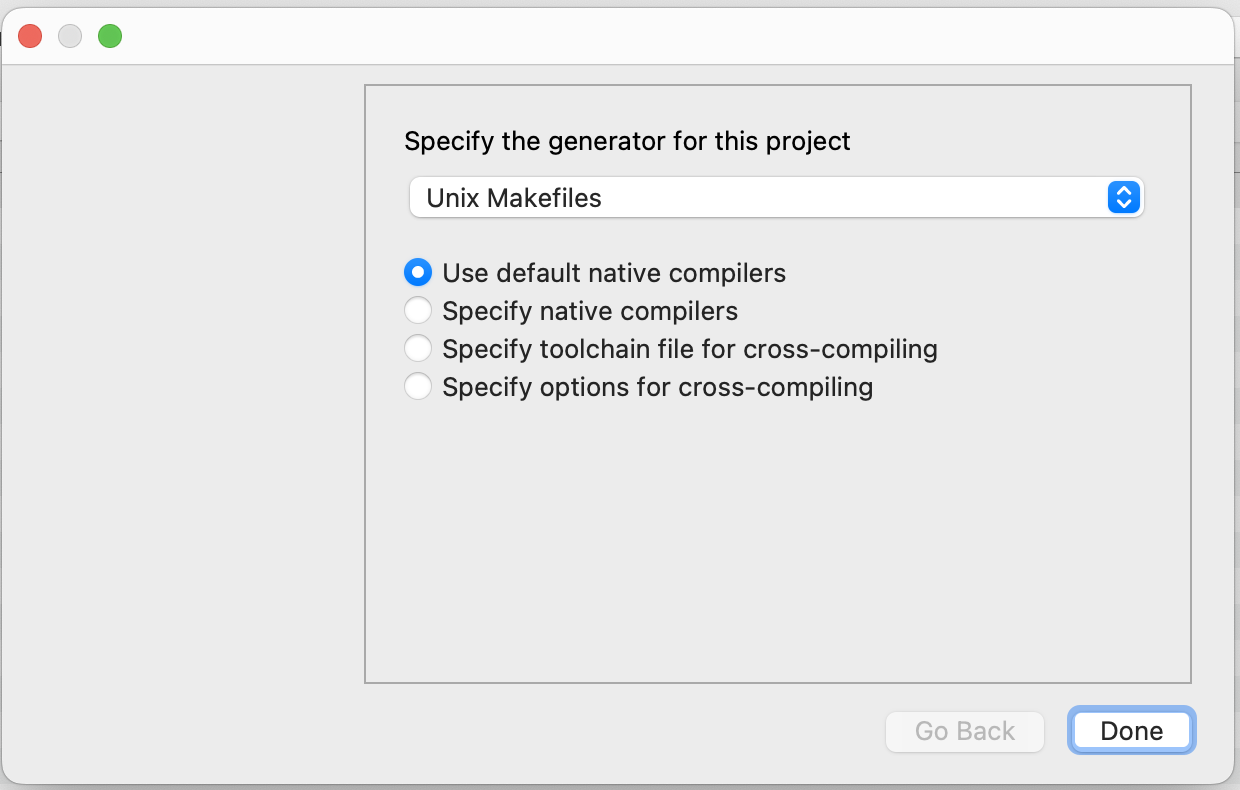
2)此时会出现一个弹框,选择Unix Makefiles,点击Done。
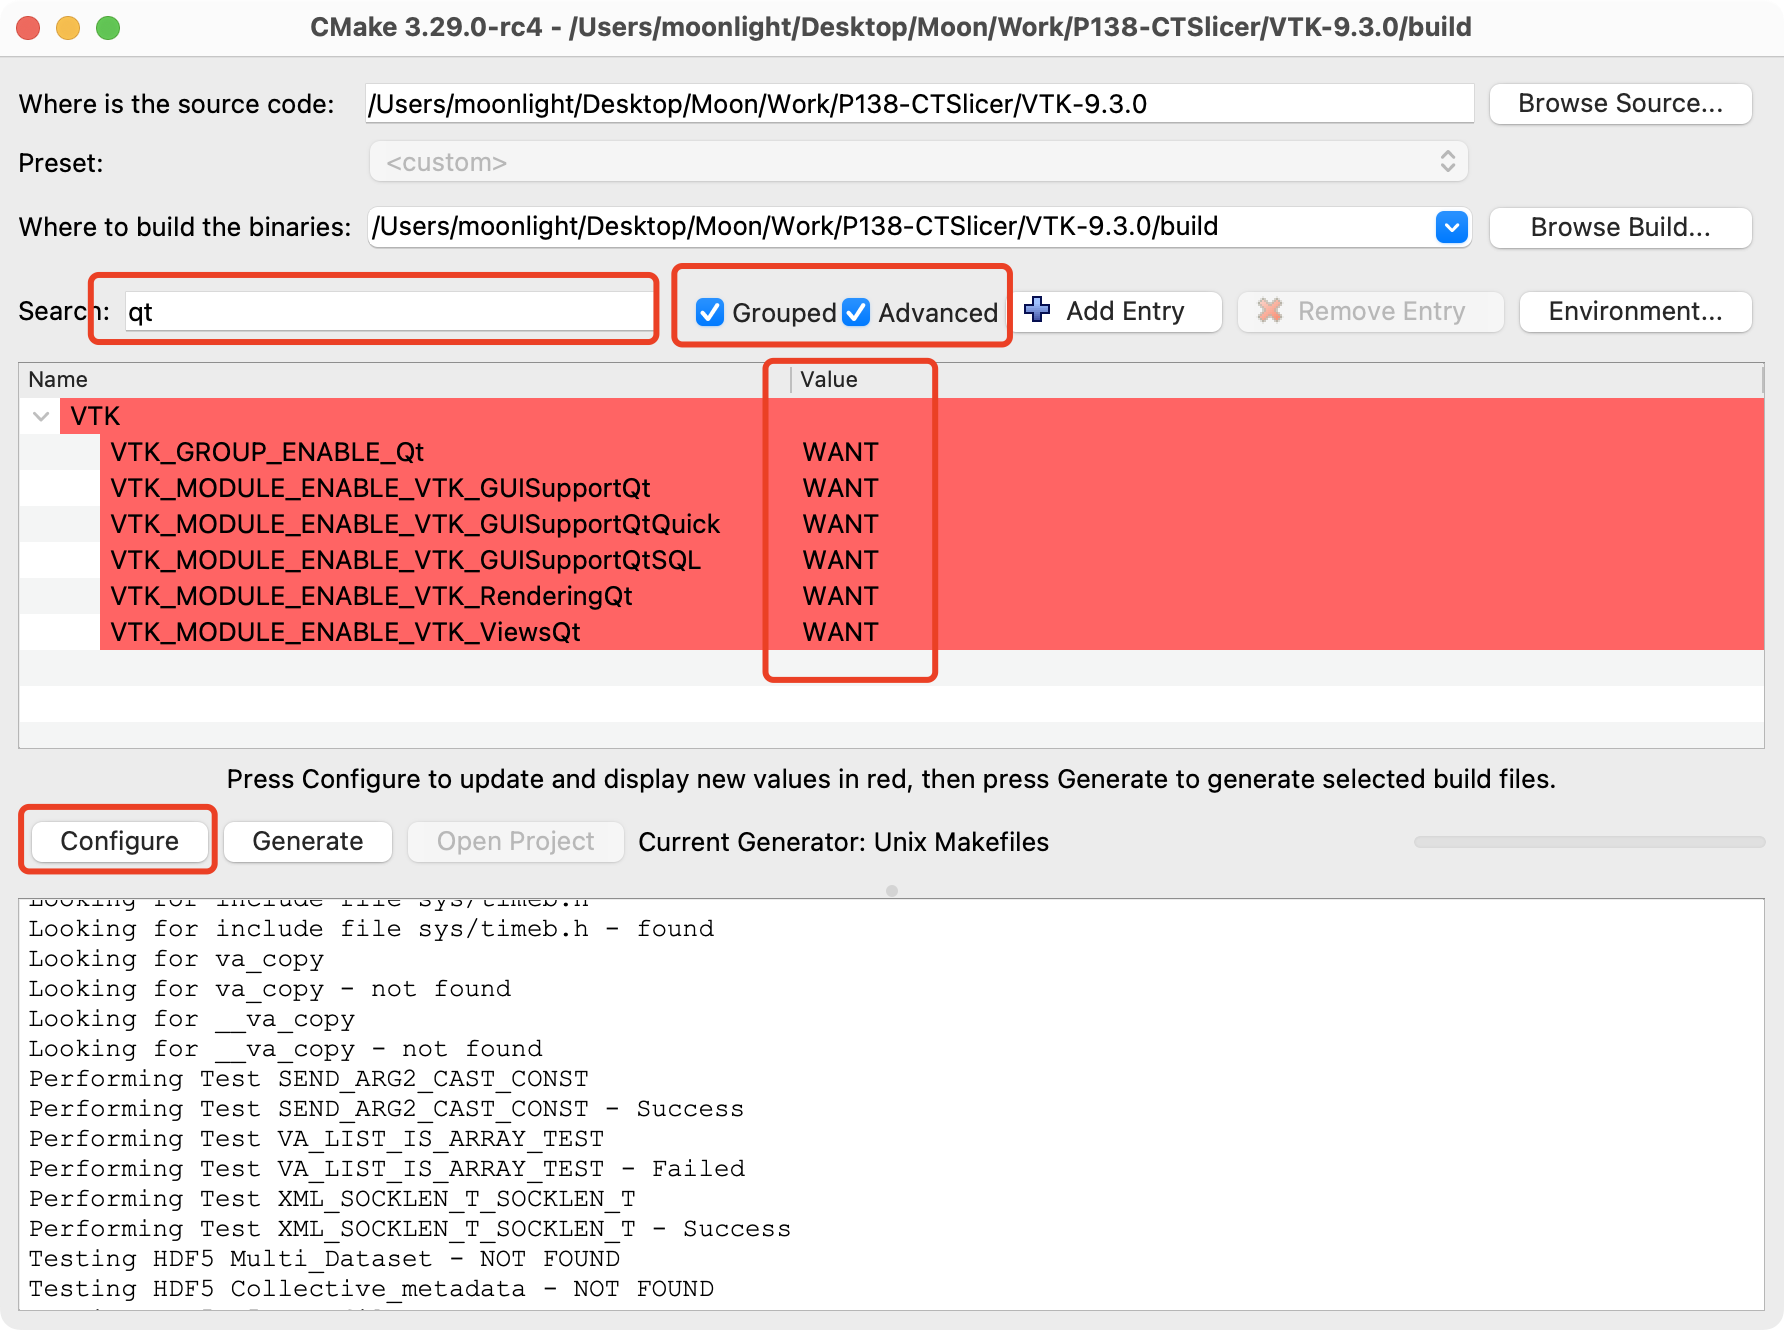
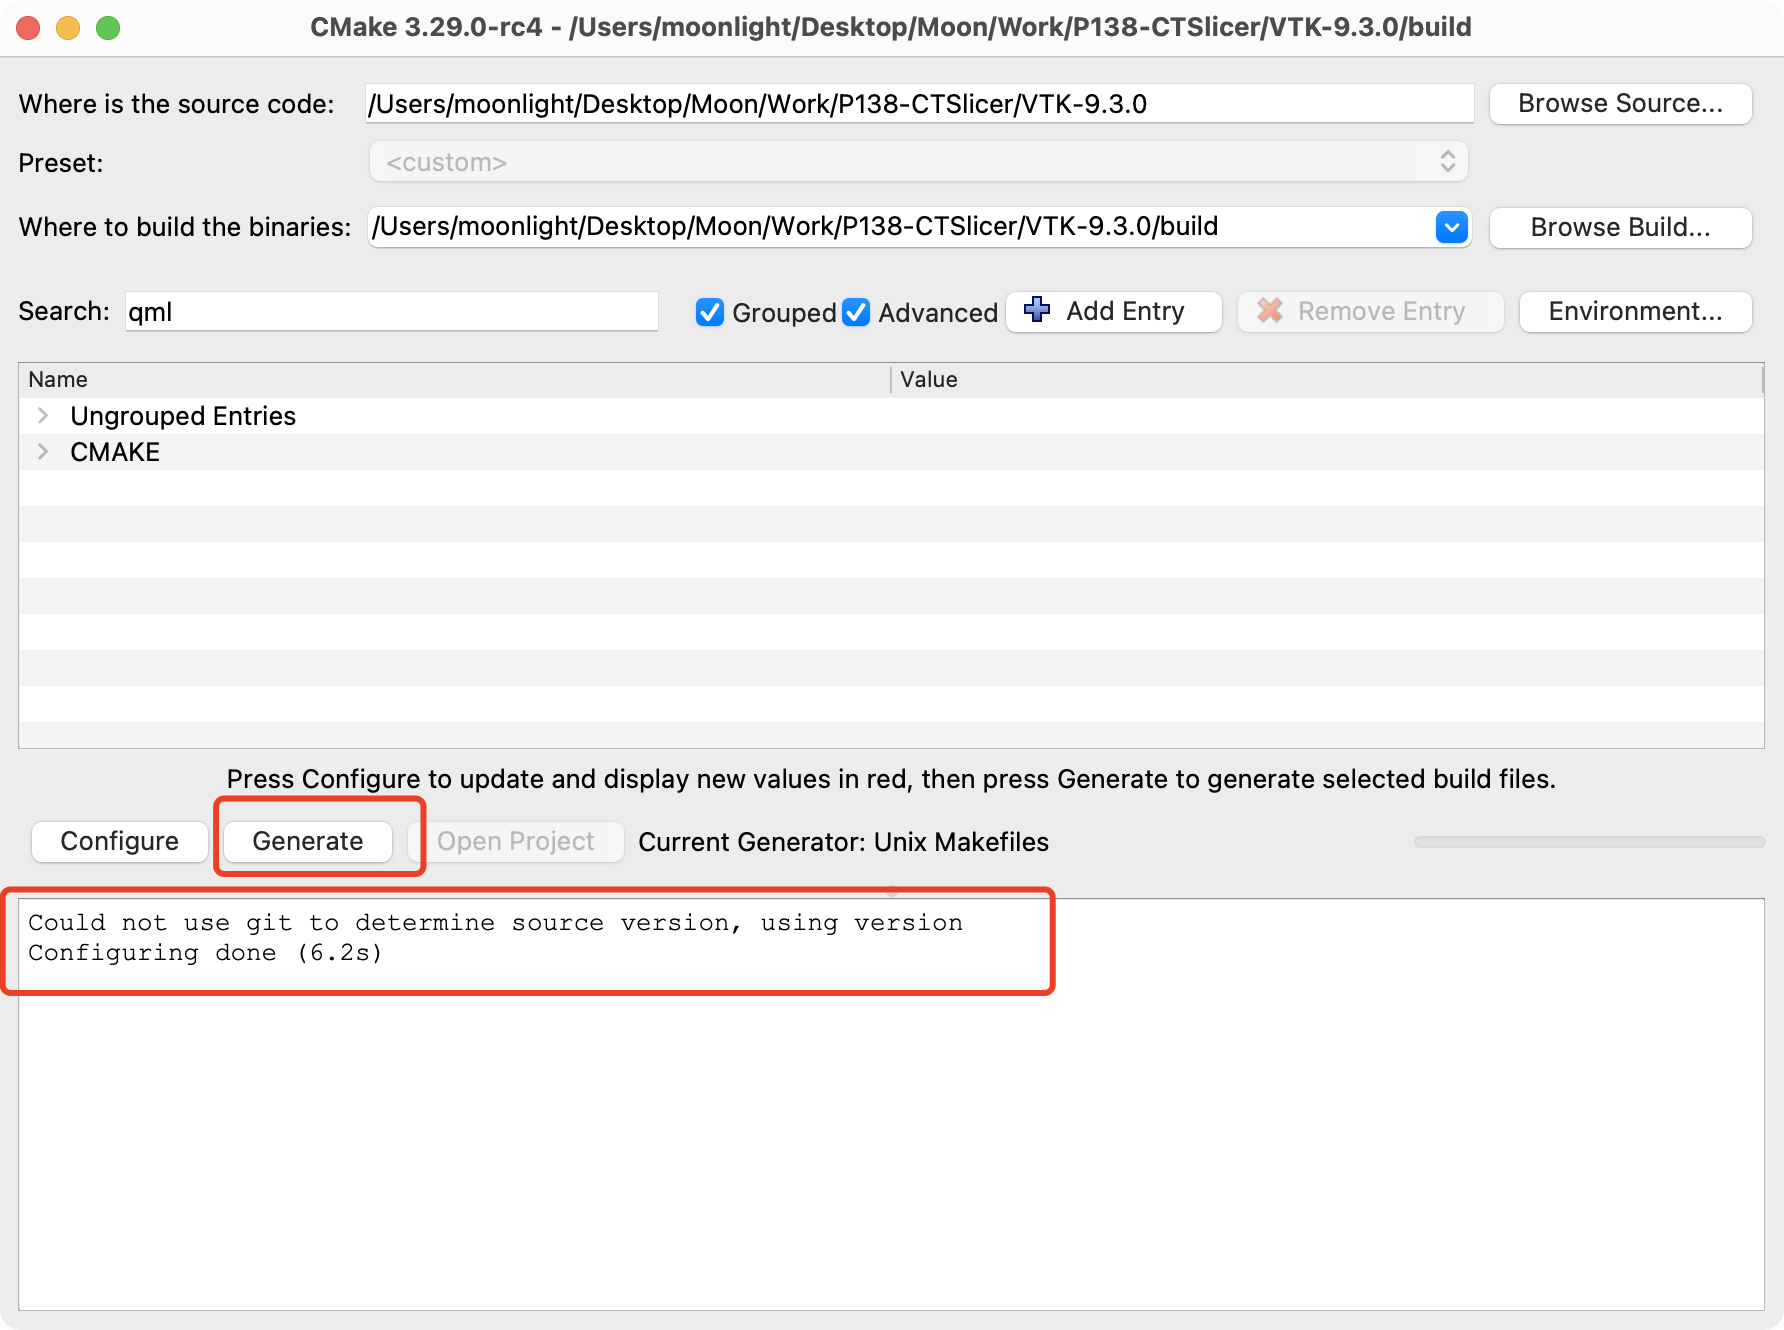
3)完成后列表中会出现很多模块,需要让VTK支持Qt,在搜索框中输入qt,将过滤出来的模块全部改为WANT,再次点击Configure。
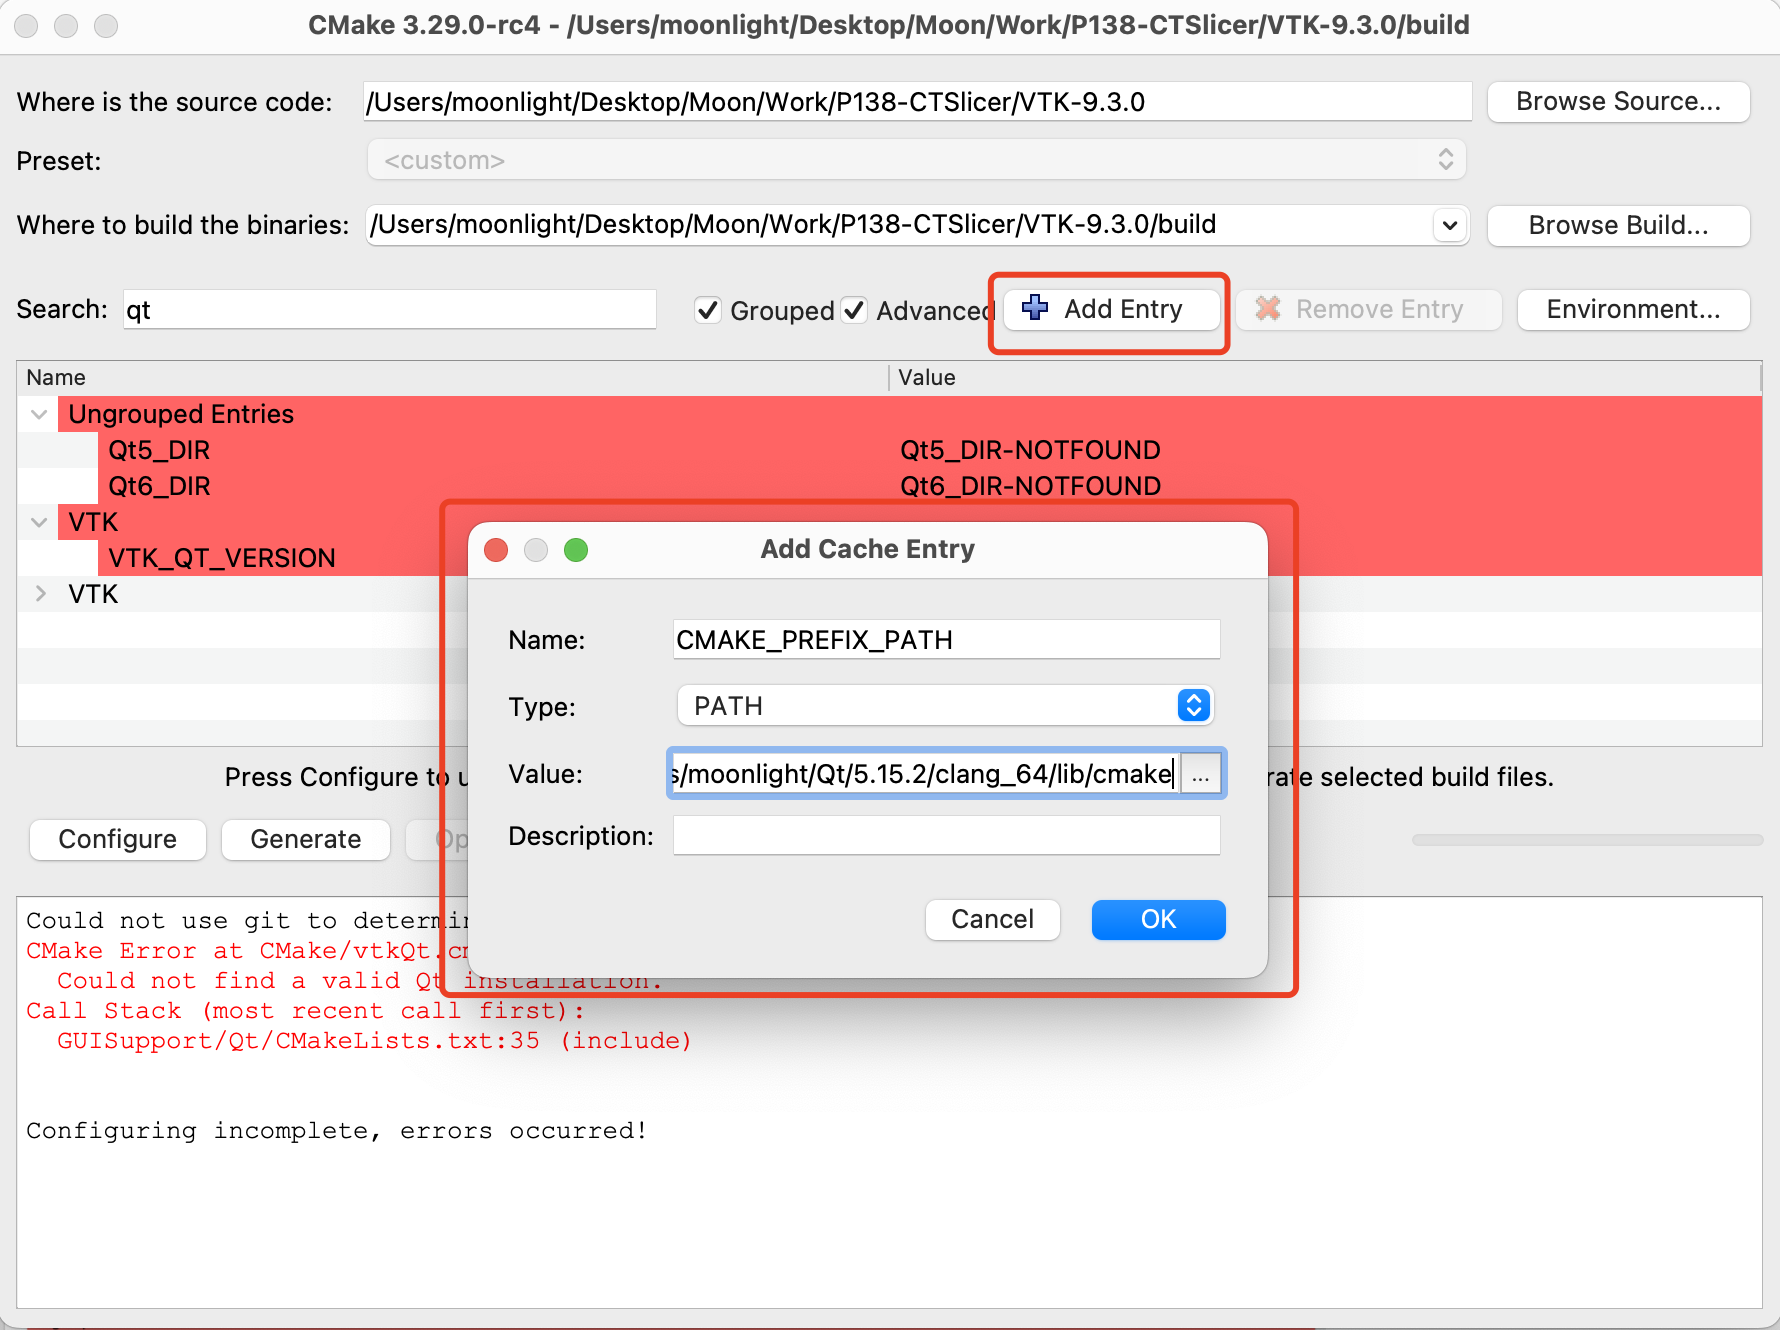
4)这时会报错提示找不到Qt,点击Add Entry添加Qt安装目录下的cmake目录。完成后再次点击Configure。
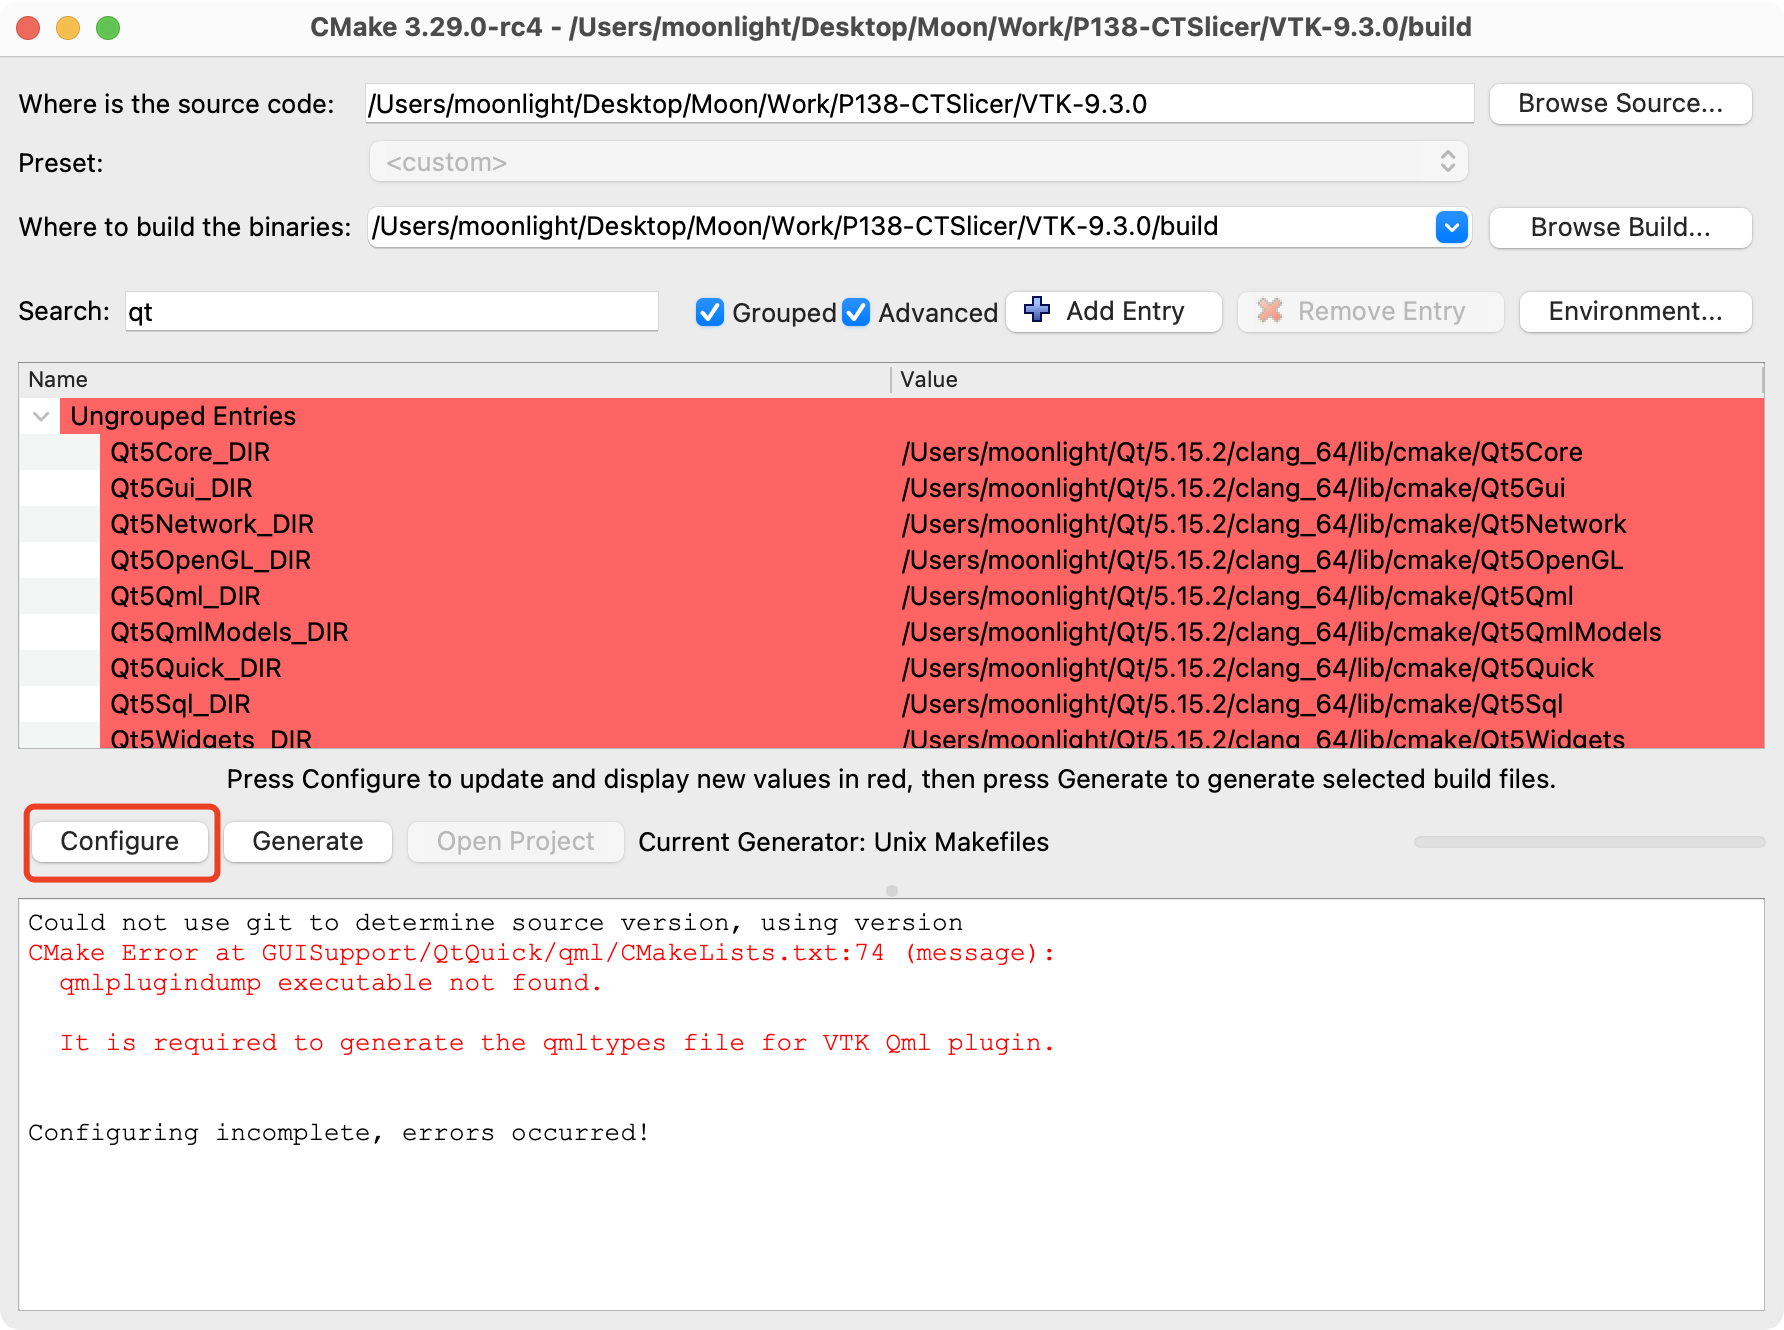
5)又报错qmlplugindump没有找到:

在Qt安装目录下搜索qmlplugindump,在bin目录下,配置该路径,再次点击Configure。(如果还有其他路径找不到的报错,都在系统中搜索找到对应路径后进行配置即可)

6)这次成功了,点击Generate生成。

2.编译安装
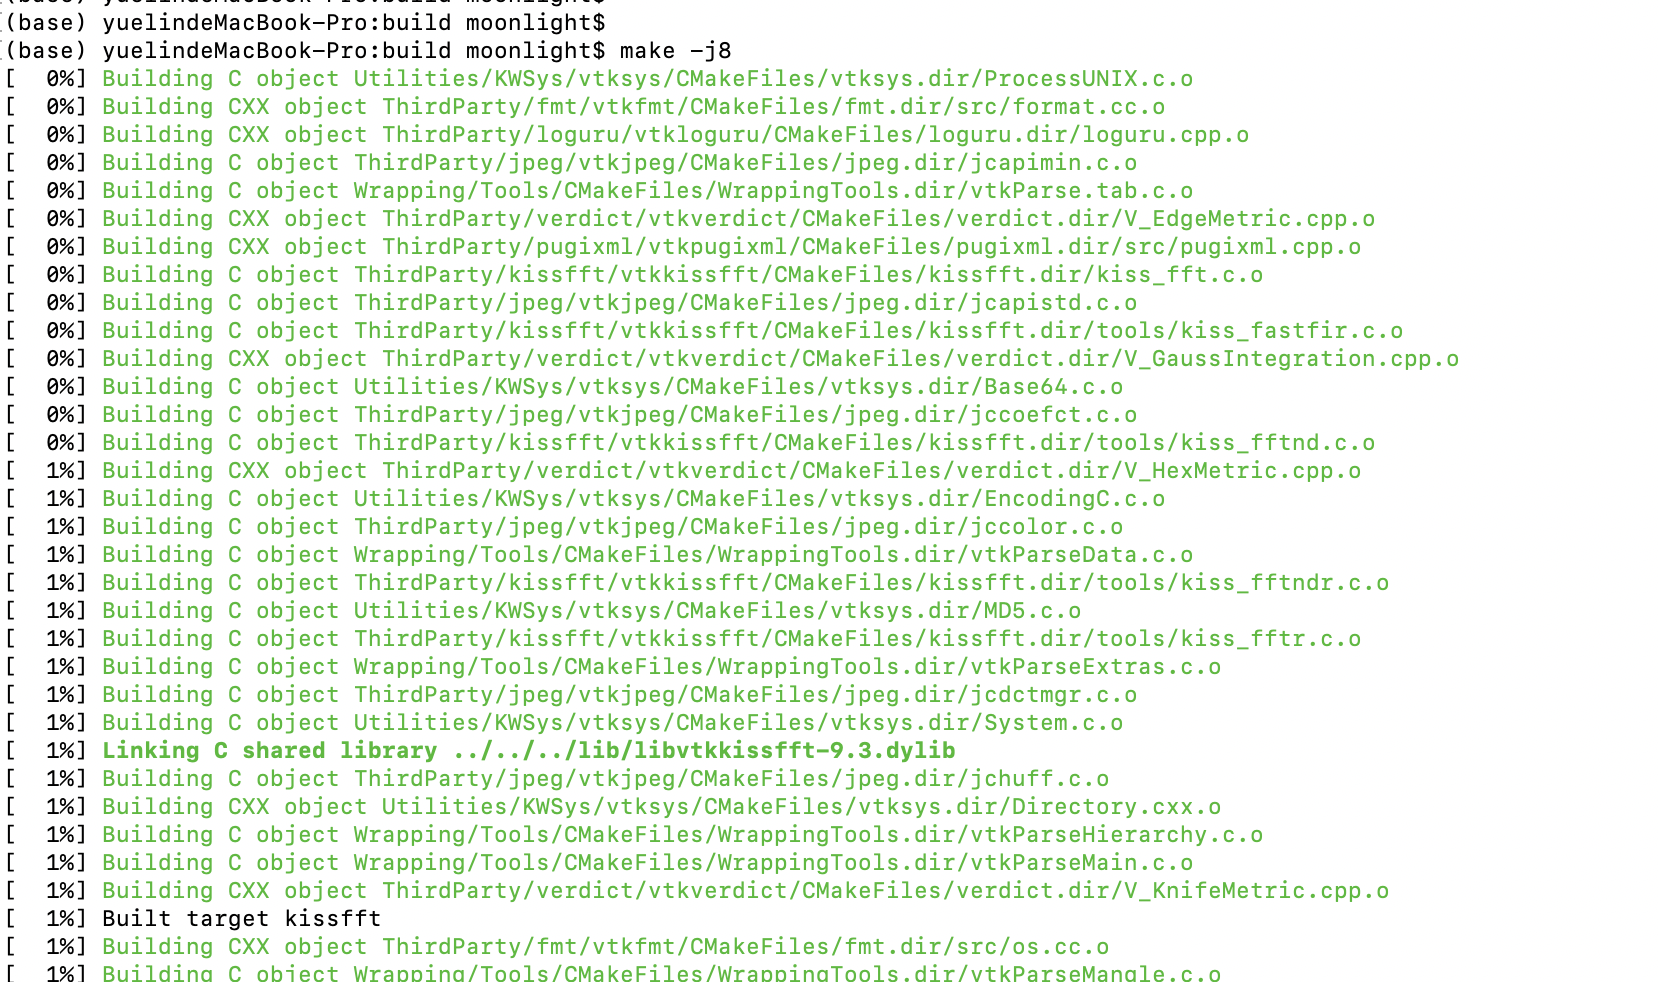
1)打开终端,进入之前创建的build目录,执行make -j8,开始编译:
2)编译成功后执行sudo make install进行安装。安装完成后可以找到以下目录和文件:
- 头文件:/usr/local/include/vtk-9.3
- lib文件:/usr/local/lib/libvtk*****-9.3.1.dylib
- cmake文件:/usr/local/lib/cmake/vtk-9.3
3)如果要卸载,则在终端进入之前的build目录,执行sudo make uninstall。
三、在Qt中配置VTK
我们的Qt项目要求使用CMake构建,在CMakeLists中添加以下配置(其中include_directories设置VTK安装后的头文件目录,ProjectName为项目名称):
# VTK库
include_directories(/usr/local/include/vtk-9.3/)
find_package(VTK REQUIRED)
if(NOT VTK_FOUND)
message(FATAL_ERROR "Unable to find the VTK build folder.")
endif()
if(NOT(TARGET VTK::GUISupportQt))
message(FATAL_ERROR "VTK not built with Qt support.")
endif()
# Prevent a "command line is too long" failure in Windows.
set(CMAKE_NINJA_FORCE_RESPONSE_FILE "ON" CACHE BOOL "Force Ninja to use response files.")
target_link_libraries(ProjectName PRIVATE {{VTK_LIBRARIES})
# vtk_module_autoinit is needed
vtk_module_autoinit(
TARGETS ProjectName
MODULES {{VTK_LIBRARIES}
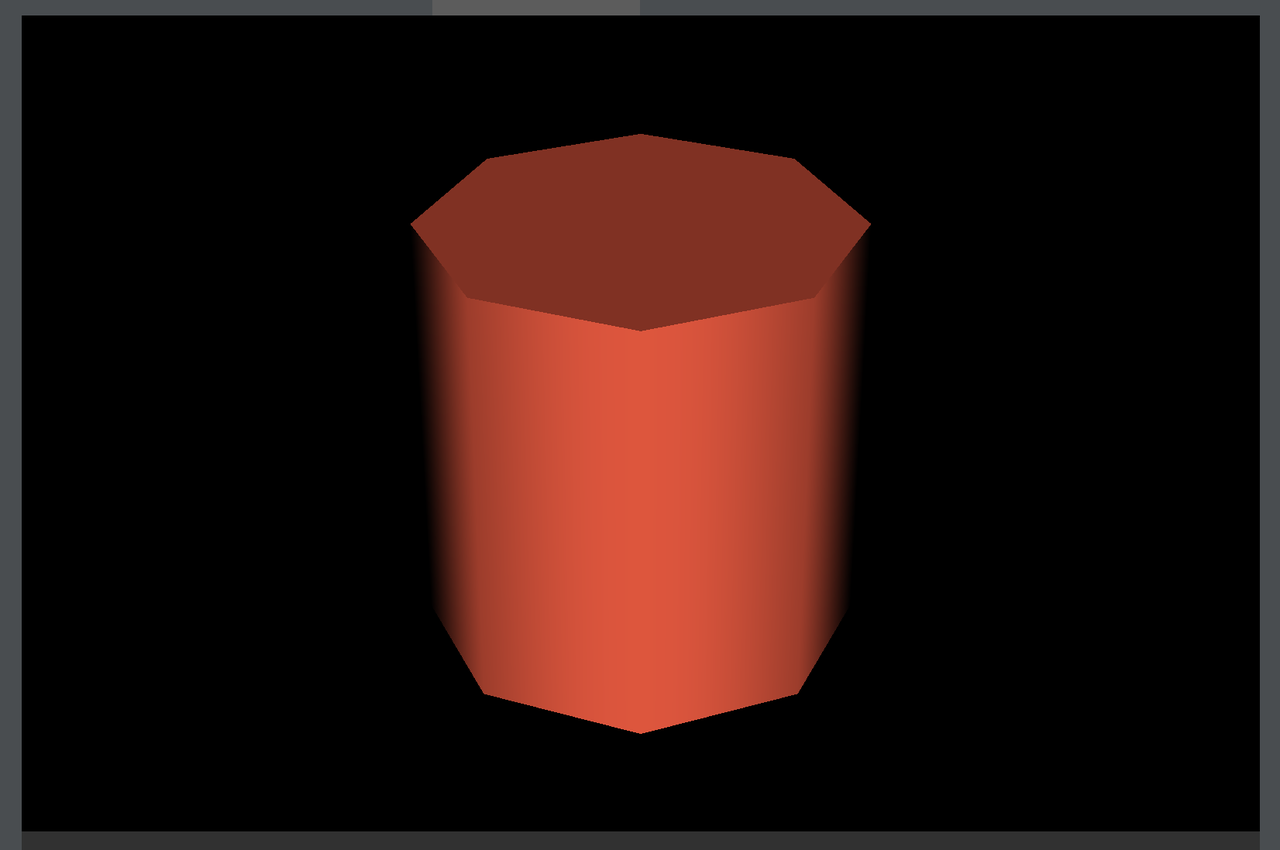
)四、测试
在Qt中创建一个窗口测试一下是否能正常使用VTK。
- 在设计器中添加一个QWidget,并将其提升为QVTKOpenGLNativeWidget。
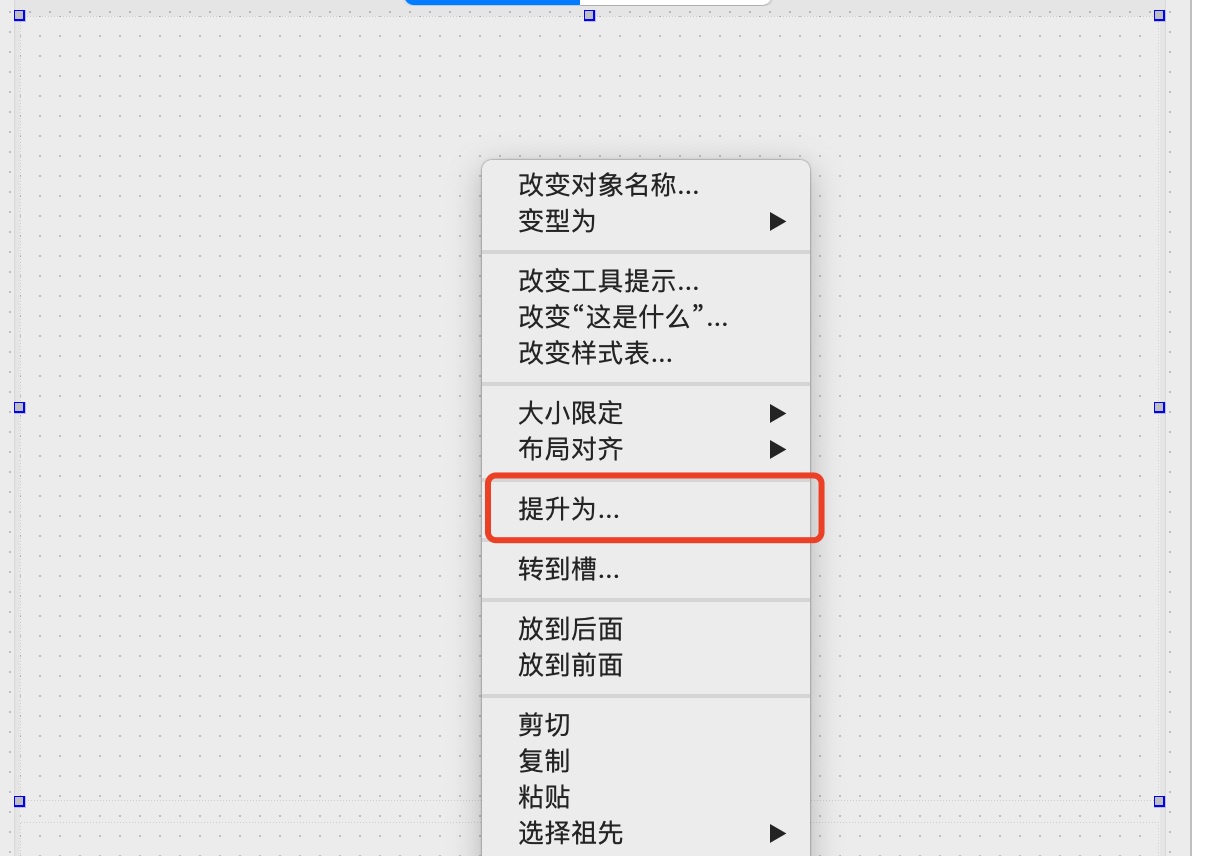

添加后点击提升,此时,这个widget就变成了QVTKOpenGLNativeWidget。

- 编写测试代码:
#include <vtkActor.h>
#include <vtkCamera.h>
#include <vtkCylinderSource.h>
#include <vtkNamedColors.h>
#include <vtkNew.h>
#include <vtkPolyDataMapper.h>
#include <vtkProperty.h>
#include <vtkRenderWindow.h>
#include <vtkRenderWindowInteractor.h>
#include <vtkRenderer.h>
#include <vtkGenericOpenGLRenderWindow.h>

CameraGraphic::CameraGraphic(QWidget *parent)
    : QWidget(parent)
    , ui(new Ui::CameraGraphic)
{
    ui->setupUi(this);
    this->layout()->setContentsMargins(0, 0, 0, 0);

    vtkNew<vtkNamedColors> colors;

    // 设置背景色
    std::array<unsigned char, 4> bkg{{0, 0, 0, 255}};
    colors->SetColor("BkgColor", bkg.data());

    // 创建8个面的圆柱体
    vtkNew<vtkCylinderSource> cylinder;
    cylinder->SetResolution(8);

    // 创建mapper
    vtkNew<vtkPolyDataMapper> cylinderMapper;
    cylinderMapper->SetInputConnection(cylinder->GetOutputPort());

    // 通过Actor设置颜色、旋转
    vtkNew<vtkActor> cylinderActor;
    cylinderActor->SetMapper(cylinderMapper);
    cylinderActor->GetProperty()->SetColor(colors->GetColor4d("Tomato").GetData());
    cylinderActor->RotateX(30.0);
    cylinderActor->RotateY(-45.0);

    // 创建renderer
    vtkNew<vtkRenderer> renderer;
    renderer->AddActor(cylinderActor);
    renderer->SetBackground(colors->GetColor3d("BkgColor").GetData());
    renderer->ResetCamera();
    renderer->GetActiveCamera()->Zoom(1.5);

    // 创建渲染窗口
    vtkNew<vtkGenericOpenGLRenderWindow> renderWindow;
    ui->vtkWidget->setRenderWindow(renderWindow);

    ui->vtkWidget->renderWindow()->AddRenderer(renderer);
}
我这里运行,报了个错:

网上查了一番,在main.cpp中添加以下代码后运行成功:
#include <QVTKOpenGLNativeWidget.h>

int main(int argc, char *argv[])
{
    // 添加后运行成功
    QSurfaceFormat::setDefaultFormat(QVTKOpenGLNativeWidget::defaultFormat());

    // 以下省略
}